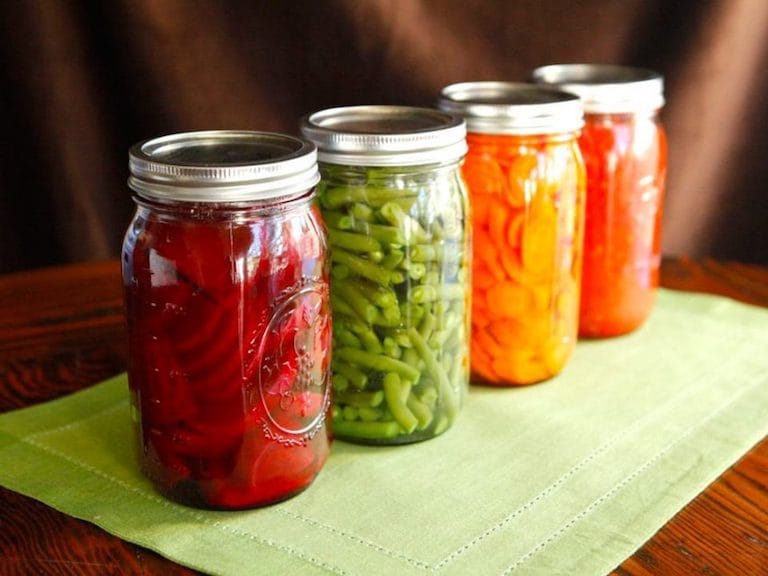
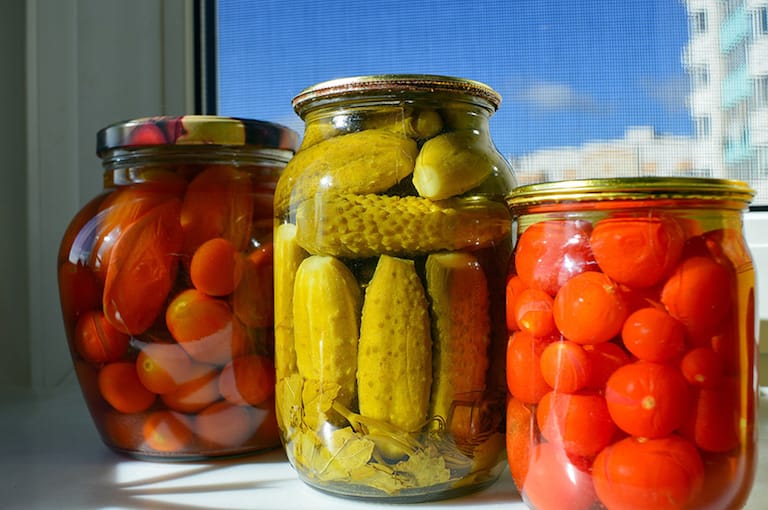
Canning is probably the most well-known form of preserving.
We’ve all had grandmothers and great-grandmothers who had rows of colorful and neatly organized jars of beautiful fruits and vegetables, jellies, soups, and spaghetti sauce and salsa. So many different choices.
Grandma would just pop down to the cellar and grab a jar or two of what she needed and head back to the kitchen. She’d pour out a delicious concoction that tasted fresh and homemade.
But canning isn’t specific to the depression era generation. It’s an easy and inexpensive way to provide your family with delicious fruits and vegetables year round.
No crazy ingredients just delicious alternatives to store-bought canned products.

The Basics of Canning – What is Home Canning?
Why should you try canning?
You can provide your family with a bounty of fruits and vegetables all year long with minimal cost and effort. No artificial ingredients, preservatives, or chemicals.
Create a stock pile that will help save you money and time. Cooking dinner will be a breeze when you have a small (or large) stock pile that you can choose from.
There are two main forms of canning:
- Water bath
- Pressure canning
Water bath is just like it sounds, submerging filled jars into boiling water after putting lids and rings on and waiting for that pop sound when they’re sealed.
This method is done with minimal up front equipment purchases, can use a stock pot or buy a water bath canner with a rack. It’s a great way to get your feet wet with canning.
Often this method is used for applesauce, pear sauce, and jams. Best for high acid fruits and vegetables.
Pressure canning requires a little more cost up front, you’ll have to purchase a pressure canner which can be pricey.
However, the vast amount of options you can create with a pressure canner makes this a worthwhile investment. Beans, lower acidity vegetables, and so much more are more ideally suited for pressure canning.
The rest of the tools you need go well with either method you choose. The only tools that are essential are the stock pot, pressure canner, and jars with new lids.
Everything else can be swapped with items you already have at home. Avoid the initial cost by using what’s in your kitchen. When you become more comfortable with canning and feel that the tools would be much more efficient for you, you can shop around for them.
Check with local thrift stores or grocery stores for reasonably priced canning tools.
- Water bath (stock pot) with rack.
- Pressure canner.
- Canning jars (mason jars).
- Rings and lids to fit.
- Jar tongs.
- Ladle and rubber spatula.
- Wide mouth canning funnel.
- Damp kitchen towel.
- Labels and writing utensils.
- Magnetic lid lifter (or make your own with a simple kitchen magnet).
You can get away with just using the basics. Most of these tools are simply things you’ll find you already have at home.
Storing your canning jars when you’re done is pretty straightforward no matter the method. Cool, dark, and dry places such as a basement or cellar. Canned foods will have an average shelf life of one year, some things last even longer.
Canning is a great way to not only store fresh fruits and vegetables but anything you can think of. Jams, jellies, spaghetti sauce, and so much more. An inexpensive way to feed your family real whole foods with very little effort.
You can use canning to create wonderful pureed baby food. No expensive jars with preservatives, just real whole ingredients.
There are similarities between both methods making it easy to learn either one. I recommend starting with the water bath technique and when you feel comfortable you can move on to pressure canning.
Canning may be an old tradition, but it is making waves with the younger generations because it of how easy and budget friendly it is.
Benefits of Canning and Preserving Your Own Food
Home canning and preserving are one of the methods to protect your food from spoilage. Although modern refrigeration technology allows us to keep our foods fresh for a few weeks, canning and preserving can help increase the lifespan of food longer than refrigeration.
Moreover, canned foods do not rely on electricity so they don’t spoil even if you have an emergency power blackout for two days. If you haven’t started canning then now is the time that you should.
Below are the benefits of canning that will convince you to start today.
- ConvenienceCanning allows you to build a pantry full of homemade foods that can fit in your busy lifestyle.
- Steady supply of homegrown foodsAlthough you can buy factory canned fruits and vegetables from your local grocery stores, you really don’t have any idea of the kinds of ingredients that they put in the preserved foods. If you do home canning, you have a stock of fresh and homegrown foods that are not only delicious but also healthy.
- Savings on food costsThe purpose of home canning and preserving is to help you save on food costs. Since you take advantage of fresh food when they are in abundance, you end up saving a lot on your food costs.
- Home canning is a fun activity to doHome canning is a chore that the entire family can enjoy. You can do home canning to teach other members of the family on how to be sustainable and not depend too much on store-bought foods.
- Achieve a sense of fulfillmentPeople who home can find sense of fulfillment knowing that they are serving their families foods that you know are healthy.
- You are in controlHome canning and preserving requires you to use natural preservatives such as vinegar, sugar and salt. But since you are doing the canning yourself, you can control the amount of sugar, salt and vinegar that you use to preserve your food. Unlike store-bought canned foods, you do not have any idea how much sugar or salt they use to preserve food.
There are many benefits of canning your own food. You benefit from having more food choices, stable supply in your pantry and good overall health for the family.
Having said this, it is important that you learn this very important skill so that your entire household can benefit from it.
Reasons Why You Should Home Canning Your Foods
There is a rising movement of home canning in America and one of the main reasons why people do home canning is that it is the easiest and most frugal ways to preserve high quality food and prevent them from spoiling.
Canning your own food can also save you about half the cost compared to buying canned foods made from factories. Another reason why people do home canning is that products of home canning are healthier than store-bought canned foods.
Below are the other reasons why people opt to do home canning instead of buy canned foods from the store:
- Home canned foods are healthierHome canned foods are healthier versions of commercially canned products. They are low in sodium and are MSG free.
- Altered to match your taste preferenceAnother good reason why people do home canning is that they can alter the flavor of their canned and preserved foods to match the exact taste preference of the entire family. Thus, it is easier to convince everyone in the family to eat the canned foods that you have made.
- It is frugalHome canning is very frugal and it can help you save a lot of money if you preserve your own food. Developing a frugal mindset is also very easy if you do home canning. In fact, some people who do home canning are encouraged to grow their own food by planting their own garden. Moreover, people who adopt other sustainable lifestyles are also into this particular home chore.
- Preserved foods make great giftsIf you are running out of ideas on what gifts to give your friends or loved ones during Christmas or any special occasion, then you can give your canned products instead. Giving a basket of canned goods is a simple yet elegant way of saying that you care for other people.
There are many reasons why people do home canning. While some people do home canning for health reasons, others just want to save money.
Whatever your reasons are, home canning is one great skill that will help you achieve independence and sustainability.
What You Need To Know About Home Canning Techniques
Although home canning dwindled during the mid-1900s, it is certainly on the rise now that many people are looking for ways on how to eat healthy as well as live sustainably.
Statistics show that one in four households in the United States do home canning for their own personal use. You don’t need to invest in very expensive equipment if you are planning to can your own food right at the comforts of your own home.
In fact, you can use ordinary kitchen tools and implements to start canning your food. This section will discuss about the different techniques in home canning and preserving:
Technique #1 – Water Bath Technique
This technique is great when you are dealing with foods with high acid content.
Thus, if you are planning to can fruit juices, salsas, tomatoes, pickles, chutneys, sauces, fruit spreads, jams, jellies and relishes, then this.
Below is a detailed guide on how you can properly do canning using the water bath technique. To can successfully using the water bath technique, you will need the following things:
- Prepared preserved recipe such as chutney, jams and jellies or fresh produce.
- Boiling water bath canner.
- Glass preserving jars with metal lids.
- Kitchen utensils like funnel, ladle and wooden spoon.
- Kitchen mittens.
Water bath canners are pots that are made from either porcelain-covered steel or aluminum. They have perforated racks that are removable where you can safely place the bottles.
If you do not have a boiling water canner, you can improvise by getting a large saucepot with a lid. Place a rack at the bottom of the saucepot where the bottles of preserved foods or produce will be placed.
|
Step 1 |
Fill the water bath canner halfway with clean water. This is a level required when you load pint jars. However, for other sizes of jars, it is important to take note that the amount of water in the canner should be adjusted such that it will be 1 to 2 inches over thetop of the filled jars. |
|
Step 2 |
Preheat the water. If you are preserving raw foods, preheat it to 1400F while preheat it to 1800F if you are dealing with hot-packed foods. |
|
Step 3 |
Load the filled jars with fitted lids to the canner and use a jar handler to lower them to the rack filled with water. Make sure that the jars remain in an upright position at all times as tilting can cause food to spill which can cause entry of air and eventually spoiling. Make sure that the bottled are tightly closed and free of air bubbles before submerging inside the water bath canner. |
|
Step 4 |
Add more boiling water if necessary to maintain the 1 inch of water above the jar tops. |
|
Step 5 |
Turn heat to high and cover the water bath canner with the lid. |
|
Step 6 |
Set a timer for the total minutes needed to process the food. Make sure that the canner is covered at all times. Maintaining a boil all throughout the process is also very important. You can adjust the heat setting to maintain boiling. |
|
Step 7 |
Add more boiling water if needed if the water level evaporates. Make sure to maintain the 1 to 2 inches of water above the bottles. |
|
Step 8 |
Turn off the heat once the bottles have been boiled for the recommended time. Wait for 5 minutes before removing the jars from the water bath canner. |
|
Step 9 |
Use a jar lifter to remove the jar and place them on a towel. Let the jar cool undisturbed for 12 to 24 hours. |
Technique #2 – Pressure Canning Technique
Another technique that you need to know when it comes to canning food is the pressure canning technique. This technique is great in preserving vegetables, meats such as poultry, pork, beef and seafood.
The reason why pressure canning is done on meats is to also sterilize and remove any pathogens like bacteria or virus that can cause the food to easily spoil.
Pressure canning technique can heat food to 2400F. Below is the correct procedure on how to can using pressure canning technique.
Water bath canners are pots that are made from either porcelain-covered steel or aluminum. They have perforated racks that are removable where you can safely place the bottles.
If you do not have a boiling water canner, you can improvise by getting a large saucepot with a lid. Place a rack at the bottom of the saucepot where the bottles of preserved foods or produce will be placed.
|
Step 1 |
Pour 2 to 3 inches of hot water inside the pressure canner. |
|
Step 2 |
Place the filled jars on the rack and make sure that they secured in place. Keep the jar upright at all times. |
|
Step 3 |
Fasten the lid of the pressure canner securely. |
|
Step 4 |
Leave the weight off the vent port of the pressure canner. |
|
Step 5 |
Turn on the heat and heat at the highest setting until the steam flows from the vent port. Let the steam flow freely from the vent port for 10 minutes and place the weight back and let the can pressurize for the next 3 to 5 minutes. |
|
Step 6 |
Start timing once the dial gauge of the pressure canner reaches the recommended pressure reading. |
|
Step 7 |
Regular the heat under the canner to maintain and maintain a steady pressure. Follow the manufacturer’s direction on how the weighted gauge works in maintaining the desired pressure. |
|
Step 8 |
Once the process is complete, turn the heat off and remove the canner from the heat. Let the canner depressurize. Don’t force open the pressure canner if it hasn’t depressurized completely otherwise the drastic change in pressure may cause the seal failures in the jar. |
|
Step 9 |
After the canner has depressurized completely, remove the weight from the port and wait for 10 to 20 minutes before you unfasten and completely remove the lid. |
|
Step 10 |
Remove the jars using the jar filter and place them in the towel. Leave 1 inch space between the jars while cooling and let them sit undisturbed for 12 to 24 hours at cool temperature. |
Pressure canning is more challenging than water bath canning. And if not done properly, you may end up having problems with your canned foods.
Spoiling occurs even if you do pressure canning because the internal canner temperature is lower than necessary.
Another reason is the air trapped inside the preserved food can lower the temperature. This is the reason why it is important that you know about the necessary processing time of different foods when canning.
How to Choose the Right Processing Time for Home Canning
Selecting the right processing time is very important. This is to ensure that canning will be successful and that your canned food will not spoil easily even if you store it at room temperature for a long time.
It is important to take note that the correct canning process largely depends on the type of food that you want to preserve and the size of the preserving jar or bottle.
This is the reason why people who do home canning need to know about the different processing time to avoid their preserved foods from spoiling.
We will cover the correct processing time to become successful in canning different types of food.
1 – Water Bath Canning
Preserving food using water bath canning technique can be very challenging. The thing is that you need to use different temperature settings for different foods that you want to preserve.
Moreover, the altitude as well as the size of the jar also affects the duration of processing time. To easily understand the correct processing time for water bath canning, a table summary is provided below:

Correct processing time for water bath canning corresponding to the type of food material used size of jar and altitude.
2 – Pressure Canning
There are different ways to do pressure canning and while some conventionally use weight-gauge pressure canning, others use dial-gauge. Different types of pressure canners also have different rules when it comes to selecting the right processing time.
This is the reason why it is important to know how to choose the right processing time for both dial-gauge and weight-gauge pressure canning. Below are table summaries on how to choose the right processing time for the two pressure canning methods:

Correct processing time for dial-gauge pressure canning corresponding to the type of food material used size of jar and altitude.

Correct processing time for weight-gauge pressure canning corresponding to the type of food material used, size of jar and altitude.
Other Factors That Involve Successful Canning
Canning is the most economical way to preserve the quality of food that you prepare at home. However, there is more to canning than just processing foods under high heat.
In fact, if you want to learn canning, it is important that you also know that proper home canning includes the following:
Careful Selection and Preparation of Food
Food contains Oxygen and enzymes that can feed microorganisms so that they multiply quickly on the surface as well as inside.
However, you can become successful in canning if you select foods that are fresh and free from damage. As much as possible, avoid canning foods that are bruised, insect-damaged or show signs of fungal diseases because they are very difficult to sterilize through canning.
By selecting fresh foods, you will also be able to make sure that you only lose minimal amounts of vitamins and nutrients once you process your food.
Packing Style of Food
There are two ways to pack food through canning and preserving and these include raw packing and hot packing. Below is a discussion regarding the difference of both terms:
- Raw PackingThis involves filling the jars with fresh and unheated food. Raw packing is a common packing technique suitable for canning vegetables inside a pressure canner. The downside to raw packing is that it encourages Oxygen from inside the tissues of food to mix in the liquid.Once the air is trapped and surrounds the food, it will cause discoloration of food within 3 months during storage. However, this will not affect the taste of the food at all.
- Hot PackingHot packing involves heating food through boiling or simmering before they are packed into jars. This practice helps in removing the air found inside the food tissues.While the food shrinks after heating, it prevents the food from floating inside the preserved jar so you can fill more food inside the jar thus saving space.
Jar Preparation
Jar preparation is very crucial in successful canning. Moreover, the types of jars and sealing lids will also affect your canning success. Below are the important things that you need to know when it comes to jar preparation:
|
Step 1 |
Clean the jar thoroughly using a detergent soap. To remove the residue, soak the jar for 30 minutes in a water solution mixed with 1 cup vinegar. |
|
Step 2 |
Sterilize clean jars prior to canning by submerging them in boiling water for at least 10 minutes. |
|
Step 3 |
Use self-sealing lid with a gasket compound to ensure that the bottle will have a vacuum environment after canning. |
|
Step 4 |
Make sure that you invest in jars that have lids that are secure. It will also make you successful if you don’t recycle the lids. Recycling lids reduces its capability to achieve a totally vacuum environment necessary for preserving food. Eventually air has a tendency to enter inside the bottle during and after the canning process if the lids are recycled. |
Adding Acids to Food
Adding acids to food such as vinegar or lemon juice can also improve the shelf life of the food after canning compared to foods that are not added with preservatives and are directly canned. This is the reason why canned foods added with acids have longer shelf lives than those that are not added with acids.
It is crucial to take note that all of these factors help destroy enzymes, remove Oxygen and inhibit the growth of pathogens like yeast, molds and the dreaded Clostridium botulinum that may cause many health problems.
How to Prepare Healthy Canned Foods
Commercially canned foods contain more salt and sugar and this is the reason why home canning is preferred by many because they have control over the amount of sugar and salt that they put in their food.
There are many conventional canning recipes that you can make but this book will discuss about healthy canned foods that you can prepare.
This is especially true if you live with someone who is required to eat foods less in sugar and salt. This chapter will give you a detailed discussion on the different types of healthy canned food recipes that you can do at home.
1 – Canning without Using Sugar
Conventional canning methods require the use of sugar to preserve food for a long time. But didn’t you know that you can still can and preserve food without using sugar?
In canning fruits without sugar, it is important to select fruits that are firm but fully ripe. Avoid choosing fruits that show signs of diseases.
Prepare the fruits for hot packs and use unsweetened fruit juices or just regular water to add sweetness to the fruit. However, if you like your preserved fruits sweet, you can always use sugar substitute Splenda© before you process the food for canning.
2 – Canning with Less Salt
Salt serves as a preservative for most foods including meats. If you don’t want to use a lot of salt when canning your food because of diet restrictions, then you can still do so without fearing that your food will spoil.
The thing is that salt used to can vegetables and meats are used primarily to enhance the flavor and not act as a preservative.
3 – Canning Baby Foods
Baby foods can also be canned so that you can have a stash of prepared meals for your baby each day. You can prepare chunk-style or pureed fruits of your choice and make sure that you follow the appropriate processing time as indicated before.
However, do not attempt to can pureed meats and vegetables because the processing time has not been determined for home use yet.
How to Can Jams
Jams, or fruit preserves, are canned fruits, vegetables and sugar that have been canned for long-term storage. Jams typically contain the flesh and juice of a fruit or a vegetable.
Sometimes, it’s also described as a jelled puree. What you have to know about jams is that they are often made by crushing or heating fruits/vegetables and adding sugar into it.
Jams can be eaten either on their own or with bread.
How to Make a Home-made Jam
First, you have to have some jam-making equipment ready. These equipment include:
- 1 large pot. 16-20 quart Teflon lined pots are the most recommended ones.
- Ladles and large spoons.
- 1 canner, or the pot used to sanitize the jars where you’ll be putting the jams in.
- Jar funnel, to help you pour the jams inside the jars.
- Ball jars. You’ll be placing the jams inside ball jars for proper storage.
- Thin metal lids with gum binder.
- Jar grabber or tongs. These will help you in picking up the jars, especially when they are hot.
- Make sure that you have cleaned/sterilized the equipment before using them.
You have to have the ingredients ready, too. You will need:
- Your choice of fruit or vegetable. Usually, strawberries, blueberries, and pineapple, or mangoes are made into jams.
- Sugar. About 4 cups of granulated, dry sugar would do the trick. If you’re not very much into sugar, you can substitute it with Honey or Agave.
- Lemon juice. It is recommended to use no more than ¼ cup of juice for every batch of fruits.
- Pectin. This is found in apples and makes the jam taste even better and last longer. Adding pectin is optional, though.
Directions
|
Step 1 |
Decide which fruits you want to use. You can buy them from the market or the grocery or pick them yourself if you want. Remember that only 6 cups of fruit at a time is recommended to make a great kind of jam. This will also make sure that the taste stays intact (1 batch = 6 cups). |
|
Step 2 |
Wash and hull the fruits. |
|
Step 3 |
Mash the fruits. Do not crush them completely so as not to lose their natural juices and to make sure that there’s still some texture left. |
|
Step 4 |
Measure the amount of sugar that you would be using. The amount of sugar you have to use will depend on the kind of fruit that you’ll be using. Again, the amount of sugar indicated below is in the proportion of a batch for every 6 cups of fruit and not just a cup alone. Here’s a quick guide:
|
|
Step 5 |
For those who want to use pectin, mix it with ¼ cup of sugar before mixing to the fruits. |
|
Step 6 |
Mix everything together and cook to a full boil. It will only take 5 to 10 minutes to get something to boil fully. |
|
Step 7 |
Add the remaining sugar and bring to a boil for at least 4 more minutes. |
|
Step 8 |
Let it stand for at least 5 minutes and then stir until there are no more bubbles left. |
|
Step 9 |
Let it cool for a little bit and then pour into the ball jars. Make sure that you seal it well in order to restore freshness and taste. |
|
Step 10 |
Boil the jars in hot water for at least two minutes, then remove them and let them cool. Store in a cool, dry place. That’s it; you have made your own homemade jam! |
Take note that in order to check the consistency of the jam, you have to keep a tablespoon with you in the kitchen while working. Use the spoon to check if the jam is too rummy, too thick, or just about right.
How to Can Fruit Butters
Fruit butter is a spread made out of fruit that is cooked to a paste and is lightly sweetened.
Fruit butter/paste is mostly popular in Latin-American countries and is sweeter and more jelled than fruit jams but with less sugar content. Some common examples are:
Jams can be eaten either on their own or with bread.
The best thing about fruit butter is that it’s easy to make and you do not need pectin or any other artificial ingredient for it. All you have to do is hull the fruit, mix it with some sugar and you’re all set.
You may also choose to cook in small or large batches. They are also perfect as gifts, especially during the holidays.
You can make Fruit Butter through different cooking methods. You may use any of the following:
- Slow Cooker – Place the pulp inside the cooker with the cooker’s lid partially off in order for steam to escape. Set at low fire and cook. Stir occasionally. Leave it at that for around 6 to 12 hours overnight or until the butter is thick enough that it doesn’t fall off a spoon.
- Stovetop Cooker – In a medium saucepan, place the sweetened pulp and cook over medium-low heat.
- Microwave – Place the pulp in a microwave bowl and cook for 20 minutes. Stir frequently until thick.
- Oven – Set the oven to 300 degrees and place the sweetened pulp in a roaster or uncovered casserole dish. Bake and stir occasionally for 1 to 3 hours or until thick enough. The result would be a darker colored butter but what’s good is that it is sturdier than other fruit butters that are cooked using a stovetop or a slow cooker.
To process the fruit butter, here’s what you have to do:
|
Step 1 |
Place the hot fruit butter in a sterilized jar. Make sure that you leave at least a ¼ inch space at the top. |
|
Step 2 |
Cover the jar with sterilized rings and lids. |
|
Step 3 |
Process in a water bath for 10 minutes. |
|
Step 4 |
Remove from heat and allow to cool for a bit before storing. Fruit butters can last for months and even up to a whole year. |
How to Can Marmalades
Marmalades are made from the peel and juice of citrus fruits that are boiled in water with sugar.
More often than not, lemon, lime, mandarins, grapefruits, sweet oranges, Seville oranges, and Bergamot oranges are used to make marmalades.
The difference between a jam and marmalade is the fruit peel that is often found in marmalades.
You can also create different kinds of Jellies for different fruits. Here’s a quick guide as to what you will need.
Remember to just follow the instructions above in order to make the jellies, and keep these in mind:
|
Step 1 |
Make sure that you wash/sterilize the equipment you will use, such as the jars. This is to make sure that once you’re done cooking, the place where you’ll be pouring the mixture into would be clean. |
|
Step 2 |
Peel the fruit and make sure that the pith of the peel is not removed. |
|
Step 3 |
Chop the peel. You do not have to include all the peel of the fruit, but make sure that you do use some because this would give the marmalade its proper texture and flavor, courtesy of the oil coming from the peel of the fruit. |
|
Step 4 |
Squeeze out the juice of the fruit. You can do this with the use of your hands, or with a fruit squeezer. |
|
Step 5 |
Boil the juice, peel, and pulp altogether. Add 500ml or a pint of water to the mixture and boil for between 45 minutes to an hour. Remember, though, that you have to keep the ingredients in a mesh bag while boiling so as to make sure that the right consistency is observed. |
|
Step 6 |
Add 1 kilogram of sugar to the mix after 45 minutes to an hour. Do this after squeezing out some more juice from the mesh bag. Boil the mixture and make sure that all the sugar gets dissolved before bringing it to a hard boil. Ten minutes should do the trick, but if you want something darker, then boil until your desired color and consistency have been achieved. |
|
Step 7 |
To check if the marmalade is already in the right consistency, blob it out in a plate and check if it’s already thick. If it’s thick and has some texture, then it’s all good, but if it falls off the plate or drizzles all over the plate, then you have to boil it again. |
|
Step 8 |
Pour the marmalade into the jars. Make sure, though, that you are wearing gloves and that there is some cold water nearby in case the hot marmalade falls onto your skin. |
|
Step 9 |
Seal the jar while it’s still hot. Keep it warm for at least a day or two before putting it in the refrigerator. A great marmalade would be something glowing or bright with some peel in it. |
How to Can Jellies
A fruit jelly is a clear or translucent fruit spread that is made from sweetened fruit/vegetable juice. It is naturally preserved through its own pectin, or the substance that makes something sticky and able to store its natural flavors.
However, you may still choose to add more pectin, or the kind of pectin found in stores/groceries, in case the fruit’s sweetness is not enough for you. This is usually done in the case of grapes.
The difference between a jelly and a jam is that when it comes to jellies, a “jelly bag” is used to filter extra pulp. This jelly bag also makes stirring easier.
Jellies are also more gelatinous or gummier than jam and are often served on their own as desserts. Sometimes, jellies are also added to fruit or vegetable salads to add more texture to the said dishes.
How to Make Fruit Jellies
You will need:
- 1 1/3 cups fruit juice of your choice.
- 4 packets powdered gelatin.
- 2 ½ cups sugar.
- 2 cups jam or fruit preserves of your choice. It would be best if it’s the same flavor as that of your fruit juice or at least something close to it.
What you have to do:
|
Step 1 |
In a small bowl or measuring cup, place 2/3 cup juice and sprinkle with gelatin. Let it sit for at least 5 minutes. |
|
Step 2 |
Combine the remaining 2/3 cup of juice and the 1 ½ cups of sugar. |
|
Step 3 |
Bring to a medium-high boil and cook until the sugar dissolves through stirring. |
|
Step 4 |
Add fruit preserves and whisk so that all the ingredients would mesh with one another. |
|
Step 5 |
Return to a boil and cook until syrupy and thick or for around 2 minutes. |
|
Step 6 |
Add the gelatin mixture and whisk until it dissolves. |
|
Step 7 |
Place the remaining cup of sugar in a bowl or a pie plate. |
|
Step 8 |
Cut the fruit jelly into 1-inch squares and toss sugar to cat the jellies before serving. |
You can also create different kinds of Jellies for different fruits. Here’s a quick guide as to what you will need.
Remember to just follow the instructions above in order to make the jellies, and keep these in mind:
- For apple jellies, you will need 3 lbs tart red apples—1/4 under-ripe and ¾ ripe—and 3 cups of water. You will also need 4 cups fruit juice, 3 cups sugar, and 2 Tbsp strained lemon juice.
- For blackberry jellies, you need 5 pits blackberries—1/4 under-ripe, ¾ ripe and ¾ cups water, 4 cups fruit juice and ¾ cups sugar.
- Meanwhile, you will need 3 ½ lb grapes for grape jellies. Make sure that ¼ of that is under-ripe and ¾ is ripe. You will also need 4 cups fruit juice and 3 cups sugar.
- For plum jellies, you will need 3 lb plums containing ¼ under-ripe ones and ¾ ripe ones, plus 1 ½ cups water. 4 cups fruit juice and 3 cups sugar are also needed.
You also have to think of the amount of pectin in a fruit. This will let you know if it’s okay to process the fruit with its own pectin or if adding artificial pectin is still needed. You can do this through two types of tests called the Alcohol Test and the Jelmeter Test.
For the Alcohol test, you have to add a tablespoon of cooled fruit juice to one tablespoon of denatured alcohol. This alcohol is the rubbing alcohol kind, which means that this test is done purely to check the state of the gelatin and not to eat it.
Stir slightly in order for the ingredients to mix. If the result is a jelly-like mass, then it means that the juice is rich in pectin. However, if the juice is lacking in pectin, then it will only form some small, jelly-like particles.
A Jelmeter test is simpler, though. A Jelmeter is actually a glass tube with an opening at each end. You’ll know about how much pectin a juice has or how much Pectin is needed through the flow rate of the juice through the tube.
To test if the jelly is ready to serve, though, you have to pour a small amount of boiling jelly onto a cold surface. Put it in the freezer for a few minutes and when the mixture gels, you’ll know that it’s ready. If it doesn’t, bring the mixture back to a boil.
That’s it. You can now make your own fruit jelly!
How to Can Curds and Conserves
Curds and conserves are two more kinds of preserves. Curds are done by curdling or coagulating milk with an edible acidic substance such as vinegar, lemon juice, or rennet, which is often use in the production of cheese, and then draining off the liquid portion afterwards. The acidity is what turns the milk proteins into curds, or solid masses.
There are different kinds of curd products and some examples are Cottage Cheese, Indian Paneer and Quark. They are usually served with fries and gravy, or some other kinds of chips.
There is also another kind of curd called the fruit curd. This is usually a creamy spread that is made from eggs, sugar, butter, and citrus juice and zest.
The most common example would be lemon curd, but recently, strawberry and cranberry curds have been emerging, too. You can use fruit curds as tart fillings and as garnish.
How to Make Fruit Curds
You will need:
|
Step 1 |
Whisk together the eggs, juice, zest, and sugar in a saucepan. Add the butter and mix then cook over moderately low heat. Whisk until the mixture turns into something that is thick enough to coat a spoon or for about 6 minutes. Make sure to use a strainer to remove unwanted egg bits or strips. |
|
Step 2 |
Put the curd into a bowl and cover its surface with plastic wrap. Chill for at least an hour or until cold. Keep in mind that it’s best to make a curd out of citrus fruits such as lemon, lime, orange, or tangerine as these fruits are naturally acidic and will easily curd. |
How to Make Conserve
On the other hand, a conserve is usually a mixture of fruit, nuts and raisins. These are mixed together and cooked until they become chunky.
Almost every kind of fruit is used in making fruit conserves, but some favorites include: strawberry conserves, apple conserves, cantaloupe conserves, cranberry conserves, and rhubarb conserves among others. Sometimes, wine is also used as one of the ingredients of a conserve.
To make conserve, you will need to:
|
Step 1 |
You will need a mix of your choice of fruits and fruit juice. Know that you can mix and match any fruits that you want, especially if you are adventurous when it comes to concocting recipes. |
|
Step 2 |
Cook the fruits and sugar with a cup of water in a saucepan over low heat for at least 5 minutes or until the skins of the fruit pop open. Add the zest and juice and cook for another 15 minutes. Remove from heat and then add the nuts or raisins. Let it cool for a bit then serve chilled. |
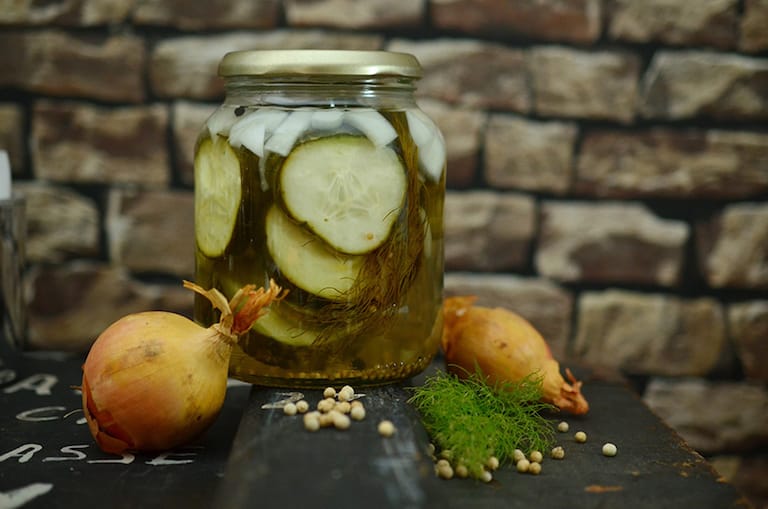
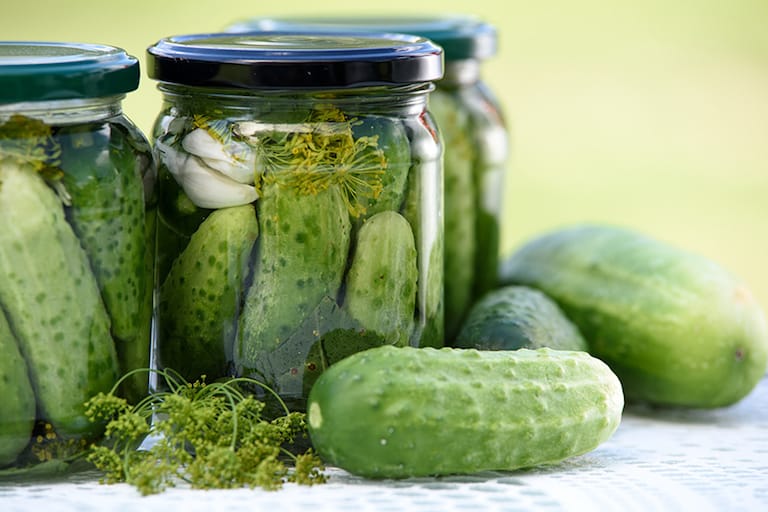
How to Pickles
Pickles are the end product of pickling. Pickling is a fermentation process wherein food is preserved through the use of brine or edible oils as the pickling agent. Pickles usually taste salty or sour.
The process of pickling also uses a pH or acidity level of only 4.6, meaning the bacteria in the food would be killed and so the pickled food can last for months.
Sometimes, garlic, mustard seeds, cloves, or cinnamon are even added to the mix to give the food a unique taste and texture.
Pickles are also often the source of healthy, pro-biotic microbes, or the natural bacteria that the body needs. Most vegetables can be pickled, but some of the favorites are:
- Eggplants.
- Green papaya.
- Cucumber.
- Bitter gourd.
- Green tamarind.
- Carrots.
- Tomato.
- Radish.
- Zucchini.
- Turnip.
- Cabbage (often used in the Korean delicacy “Kimchi”).
How to Make Pickles
You will need:
|
Step 1 |
Before everything else, make sure you have the right equipment at hand. These include a large pan where you will boil the pickling solution, some jars, and a heat-proof container. |
|
Step 2 |
Sterilize the equipment so that they are clean and would be ready to use. |
|
Step 3 |
Decide which vegetables you want to pickle, and cut or slice them into your desired shapes/length. Wash, peel, and seed them as required and make sure that they are clean. |
|
Step 4 |
Boil the pickling solution. This is the combination of water and salt, plus some vinegar. |
|
Step 5 |
Pour the vegetables into the jars, but make sure to leave at least a ½-inch space near the lid. |
|
Step 6 |
Pour in the pickling solution. |
|
Step 7 |
Place the lid on the jars but allow them to cool first before sealing them. |
| Step 8 |
Put the jar in the fridge. You can expect your pickles to stay fresh for at least 3 to 6 months. |
How to Can Salsas and Relish
Basically, salsa is the Spanish term for the word “sauce.” A salsa is usually a tomato-based hot sauce that is usually used as a dip for nachos, chips, and other finger foods. Aside from tomatoes, mangoes, jalapenos, mint, and pineapple are also now used in creating salsas.
Aside from being a dip for chips, you can also use salsa as:
- A pizza base.
- An additional flavoring or as the main sauce of your macaroni and cheese to make it taste differently.
- As part of a grilled cheese sandwich.
- As a salsa salad.
- As a flavoring for scrambled eggs to give them an edgy, zingy taste.
- As a sauce for hotdogs instead of the usual ketchup.
- As an additional flavoring for a soup.
Making Salsa is not actually very hard. Try this recipe for a classic tomato salsa.
Remember, though, that you can substitute tomatoes with jalapenos, or mangos or any fruit or vegetable that you want in case you’re not very fond of tomatoes. What’s important about the salsa is that there is some chili used to give it its spicy flavor.
How to Make a Classic Tomato Salsa
|
Step 1 |
Prepare the chili peppers first. Peel them over a gas burner and let them dry in a girdle pan. |
|
Step 2 |
Place the heated chili peppers in a plastic bag and let it cool for around 20 minutes. |
|
Step 3 |
Take off the skin of the chili peppers after 20 minutes. |
|
Step 4 |
Slit the peeled chilies open and then scrape out the seeds. This is to ensure that you would not have a hard time removing them once you’re already eating. |
| Step 5 |
Chop the chili peppers and then put in a small bowl. |
After preparing the chili peppers, it’s time for you to make the salsa. You will need some tomatoes, onions, lime juice, sugar, and cilantro or coriander. Here’s how:
|
Step 1 |
First, decide about how hot you want the salsa to be. 3 chili peppers are good for a moderately spicy salsa, while 6 chili peppers would make it extremely hot. |
|
Step 2 |
Chop the onions and then mix these with lime juice and lime rind in a bowl. This is done so that the onions would be soft and thus would not be hard to chew, especially for those who are not so fond of onions. |
|
Step 3 |
Peel the tomatoes and soak them in a bowl of hot water for 30 minutes. After 30 minutes, drain the tomatoes and peel off the skins. |
|
Step 4 |
Dice the peeled tomatoes and then add to the soaked onions and lime. |
| Step 5 |
Chop the cilantro or coriander and add to the salsa mixture. |
|
Step 6 |
Add the chili peppers and the sugar. |
|
Step 7 |
Mix everything together until the sugar dissolves. |
|
Step 8 |
Cover the salsa bowl and chill for at least 2 to 3 hours. |
|
Step 9 |
Garnish with lime rind and then serve with corn chips, tortillas, rice, or beans. |
That’s it: your salsa’s ready to serve!
On the other hand, a relish is any pickled, cooked, or chopped vegetable that is mostly used as a condiment to enhance other food products. It first became popular in India but is now used all over the world.
Making relish or pickle relish is also not that hard to do. Here’s a sample pickle relish recipe made from cucumbers as well as the equipment you will need.
Equipment needed:
- 1 teflon-lined large pot.
- Jar grabber.
- Lid lifter.
- A half pint or one pint canning jars.
- Lid rings. These are used to seal the lids of the jars.
How to make a Cucumber Pickle Relish
|
Step 1 |
Cut off the ends of the Cucumber before chopping. Take note that you will need 2 to 3 cucumbers for a one-pint jar. |
|
Step 2 |
Wash the cucumber in plain water and chop into your desired length/texture. |
|
Step 3 |
Chop 6 large peppers. This is enough to fill up 3 cups. |
|
Step 4 |
Chop 2 onions to be able to fill up one cup. |
| Step 5 |
Soak the chopped vegetables. To do this, you have to combine 3 quarts chopped cucumbers, 1 cup chopped onions, ¾ cup canning/pickling salt, 3 cups chopped sweet/green onions, 2 cups ice, and 4 cups water. Let it stand for at least 4 hours. |
|
Step 6 |
Drain and discard the salted water. |
|
Step 7 |
Put some ice cold water over the vegetables for another hour. |
|
Step 8 |
Combine 4 teaspoons of mustard seed, turmeric oil, whole cloves, and whole allspice in a cheesecloth bag. Add the spices to a mix of 2 cups sugar and 6 cups white vinegar. |
|
Step 9 |
Heat the vinegar/spice mix to a boil. |
|
Step 10 |
Pour the vinegar/spice mix over the chopped vegetables. |
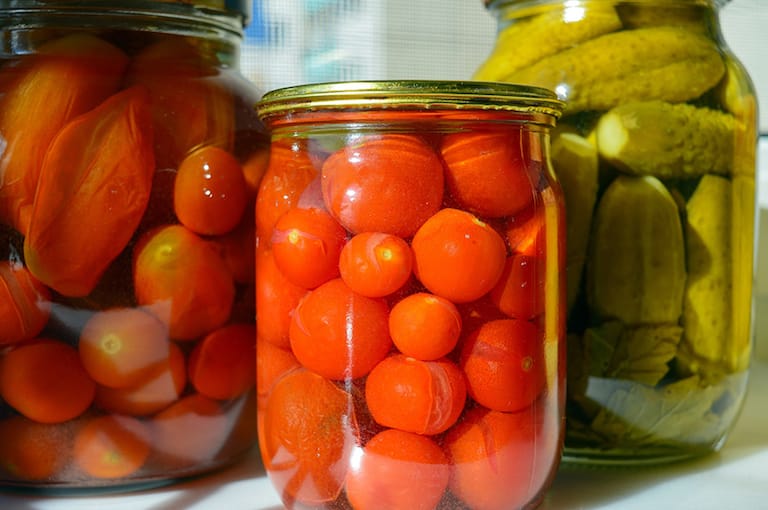
How to Can Tomatoes
Tomatoes are among the easiest fruits to preserve because there are a lot that you can do about it.
Plus, you can also use them in different recipes in different ways such as using them as a pasta or pizza sauce, as a salsa, for tomato-based soups, and for adding it to other dishes.
Below are some ways on how you could preserve tomatoes.
|
Step 1 |
Canning keeps tomatoes fresh all year. Tomatoes are blanched in hot water, peeled, and then stuffed into jars, are covered and then boiled again to make sure that the jars are sealed. If you have any excess ripe tomatoes lying around the kitchen, then you may want to get them canned so that they’d stay in good condition for a long time. |
|
Step 2 |
To do this, bring a large pot of water to a boil and then use a sharp knife to make an “X” on the tomatoes. Put the tomatoes in while the water is boiling and then cook them for a minute. Afterwards, you can take out the tomatoes, let them cool for a few minutes, and then remove the skin with the use of a paring knife. Sterilize the jars for around 10 minutes. |
|
Step 3 |
Put 2 tbsp lemon juice in each sterilized jar and then put the tomatoes in. Put the lids of the jars on, leaving a ½-inch space near the top, and then boil for around 45 minutes. Remove from the boil and let it cool overnight before storing in a cool, dry place. |
How to Can Whole Fruits
Whole fruits are some of the most challenging fruits to preserve in a sense that some people find it hard to squeeze them together inside a jar or to make sure that they stay in good condition even when canned or preserved.
You first have to know which fruits can be preserved even if you do not cut them or hull them and which fruits really cannot be preserved as well as the easiest ways to preserve them.
- Peppers – It is known that hanging peppers by the door will allow them to stand the test of time. They might wither a bit but they will stay bright for a long time. Do not put them in jars, though, especially if you did not boil and cut them. Otherwise, they will just rot.
- Pumpkins – Pumpkins can stay fresh for a long time even if you do not cut them up. Simply wipe some vinegar on them to prevent mold from growing. Do not try this during spring, though, because pumpkins easily rot during springtime.
- Corn – Corn can be dried if you just hang it up. It is recommended to use Indian corn or field corn since they can really stay fresh for a long time and will still taste good when dried.
- Gourds – Gourds can dry on their own and are beautiful when polished with gloss. Preserving gourds is meant for decorative purposes only. If you wish to use them for other types of preservation such as pickling or canning, you will have to cut or slice them up as mentioned earlier.
- Apples, Oranges and Lemons – These fruits are not meant to be whole-dried for edible purposes. It’s also best to cut them up if you wish to can them or turn them into jams or jellies. However, large oranges can be turned into Pomander balls or a piece of fruit that has been pierced by cloves for decorative purposes. Pomander balls are perfect for the holidays.
- Bananas, Kiwis, and Other Soft Fruits such as Mangoes – Drying these out whole is impossible as they rot easily. You have to cut them up and boil them in order for them to be preserved.
Tips on How to Make High Quality Canned Foods
Canning is a great skill that you need to learn today but it takes a lot of patience and practice to get it right. In fact, many people who are hooked to canning started with a lot of failures thus you should not feel discouraged once you end up having a few of your bottles spoiled.
While spoiled preserves are common among those who are starting, it can be avoided if you know the right tips and tricks. Now we’re going to guide you on what you need to do to make high quality canned foods minus a lot of spoiling in your preserved batches.
1 – Quality of Food Used
The quality of food used is very important when canning. Start with good quality foods that are suitable for canning.
It is important to take note that not all kinds of foods are great for canning. To be successful in canning, below are the things that you need to know about food quality.
- Examine the food and make sure that they are fresh and not affected with diseases like spots and molds. If you still want to can foods that have diseases, discard the diseased spots or lesions using a clean kitchen knife.
- Whether you plan to can foods from your garden or bought from a local farmer, make sure to can then within 6 to 12 hours upon harvest of purchase. If you plan to delay your canning for a few more hours, make sure that you store your produce in a cool and shady place.
- Freshly slaughtered red meats as well as poultry should be canned immediately. Avoid canning meat from diseased animals. For fish, remove the entrails first and can them within two days.
2 – Maintaining Flavor and Color of Canned Food
When you can your food, the color usually changes because the food is subjected to high heat. Although the color and flavor might be affected, there are ways for you to maintain these two things in your canned food.
- Make sure to remove the bubbles or Oxygen from the food itself as well as the jar. You can do this by hot packing the food.
- Destroy the food enzymes that can cause discoloration on the food through heat.
- Get jars that have airtight seals.
- Limit the time of exposure of your prepared food to air. If you must, can them once you have finished preparing them.
- For apples, nectarines, peaches, apricots and pears, soak them in a solution of water and ascorbic acid. You can also use other vitamin C tables or commercially prepared mixes of citric acid to prevent discoloration on your produce during the preparation.
3 – Containers
Food may be canned in glass bottles or even metal containers. Most people who home can opt for wide-mouth Mason jars with self-sealing lids because they create tight vacuum air space during the canning process.
However, other types of jars are fine. Below are the tips on how to have high quality canned foods using the right bottling techniques.
- Sterilize the containers prior to filling them with food for canning. Soak them in water mixed with a cup of vinegar before boiling them for 10 minutes.
- Fill hot foods inside the jar and adjust the headspace. The headspace refers to the unfilled space above the food inside the jar. Different types of foods require different headspace. Below is a list of food with their corresponding headspace:- Jellies and jams require ¼-inch headspace- Fruits and tomatoes processed in boiling water require ½-inch headspace- Low acid foods such as vegetables require 1 to 1 ¼-inches headspace especially when processed inside a pressure canner.
- The key to controlling the headspace is to take note of the air expansion that occurs during the canning process. At higher temperatures, the air expands more thus it is important to leave a lot of headspace especially if you are using pressure canning.
- Before closing the lid, make sure to wipe the upper rim of the jar with a clean cloth to remove moisture. This removes moisture around the rim that might cause some air outside to penetrate the container.
- Tighten the screw bands securely in place but avoid over tightening the lid as possible.
- Make sure that the jars do not tilt during the entire processing time.
- Once you remove the hot jars from your canner, never retighten the lids because it will cut through the gasket thus causing seal failures. Instead, let the jars cool at room temperature for 24 hours so that the jar naturally loses the air and creates a tight vacuum seal.
- Test the jar seals once they have cooled. There are many ways that you can test if the seals are secured in place. First, you can press the middle of the lid with your thumb and once it springs up, then the lid is not properly sealed. Another thing that you can do is to tap the lid with a bottom of a teaspoon and if creates a dull sound, then it is sealed. A properly sealed bottle creates a high-pitched sound.
- If the lid does not seal properly on the jar after canning, remove the lid and examine the jar sealing if it has tiny cracks. If there are cracks, change the jar and reprocess the food within 24 hours.
4 – Storing the Finished Products
Once you have checked that the jars are vacuum sealed, remove the screw bands and wash the lid as well as the jar to remove any food residue.
Dry them using a clean kitchen towel. It is important that you label the jars with their name and processing date and store them inside a cool, dry and ark place.
If you store your canned foods in places that have temperature exceeding to 950F, the food will easily lose quality within a few weeks. Never freeze unopened jars because the moisture inside the fridge will make the metal lids corrode.
However, if you need to freeze them, make sure that you wrap them in newspapers or any moisture-absorbing material to prevent the metals from corroding and damaging your seal.
5 – Dealing With Spoiled Canned Preserves
Although you were confident that all of your canned products are tightly sealed, there will be one jar that will go bad. What happens when your canned food gets spoiled is that bacteria and yeast gets inside the jar and produces gas.
The buildup of gas swells the lid and eventually breaks up the jar seal. Carefully preserved foods do not contain bubbles and if your canned foods contain bubbles, it is indication that it is going bad.
Below are the tips on how to deal with spoiled canned foods so that you prevent feeding yourself and your family with food laced with deadly bacterial toxins.
- Place the suspected sealed glass jars inside a sealed garbage bag and dispose immediately.
- If the suspected jars are unsealed or opened, it is important to detoxify it to remove the presence of the bacteria Clostridium.
- When sterilizing contaminated jars, it is important that you carefully treat the contaminated jars by placing the contents inside a trash bag and throwing it away immediately.
- Boil the contaminated jar in boiling water for 30 minutes.
- Make sure that you clean up the area because the bacterial spores of Clostridium botulinum can be fatal when ingested. Spray your table and stove top with a bleach solution.
Conclusion
Canning is one of the most essential skills that you need to know so that you can prepare healthy foods for your family.
It is a skill that will help many people save money on their grocery costs and, at the same, decrease their dependence on store-bought canned foods that are laden with sugar and salt.
So if you are still deciding to take on canning as a new and sustaining hobby that your family can enjoy, then now is the time that you start. You will surely enjoy the many benefits that canning and preserving foods can give you through time.
